Unlocking Expressive Art: A Deep Dive into Procreate Portrait Creator Brushes
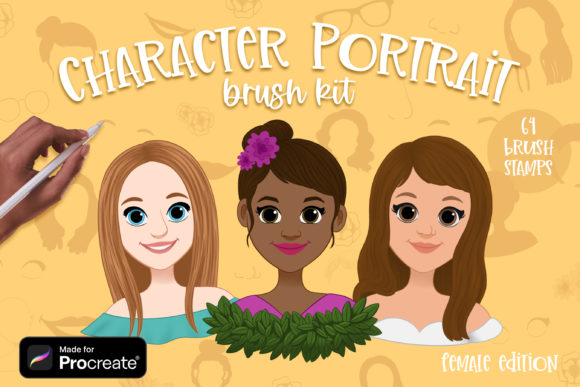
Digital portraiture often feels like a balancing act between technical precision and artistic soul. For many creators, the hardest part isn't the vision; it's the time-consuming process of rendering hair strands, fabric folds, or skin textures from scratch. This is where Procreate Portrait Creator Brushes step in to change the workflow entirely. These aren't just simple stamps; they are comprehensive toolkits designed to accelerate the creation of unique character portraits, specifically tailored for female subjects but versatile enough for a wide range of artistic styles. When you dive into a collection that includes 64 distinct brush stamps, you are essentially downloading a library of pre-rendered artistic decisions that allow you to focus on composition and storytelling rather than repetitive detailing.
The core value of these brushes lies in their specialization. Unlike generic texture packs, a dedicated Character Portrait Creator set understands the nuances of human anatomy and fashion. The inclusion of specific sets for Female Portrait Hair, Female Portrait Base, and Female Clothing and Extras means that an artist can build a cohesive look without switching between dozens of unrelated files. Imagine working on a commission with a tight deadline. Instead of spending three hours painting individual locks of wavy hair, you can utilize the hair stamp set to lay down the volume and flow instantly, then use a standard eraser or smudge tool to blend it naturally into the scalp. This shifts your role from a laborer of pixels to a director of light and form.
Real-World Applications Across Industries
The utility of these tools extends far beyond hobbyist sketching. In the realm of concept art for gaming and animation, speed is currency. Character designers often need to present multiple variations of a protagonist to a studio executive by the end of the day. By leveraging the Female Clothing and Extras set, a designer can rapidly prototype different outfits—swapping a Victorian collar for a futuristic jacket in seconds. This allows for more iterations and, ultimately, a stronger final design. The ability to visualize "what if" scenarios without repainting the entire figure encourages creative risk-taking.
Similarly, authors and self-publishers frequently require cover art or interior illustrations that feature distinct characters. For writers who illustrate their own books or collaborate with artists, having a reliable set of Procreate Portrait Creator Brushes ensures consistency across a series. If book one features a heroine with a specific hairstyle and wardrobe aesthetic, those same brushes can be used in book two to maintain visual continuity, even if the scenes or angles change. This consistency builds brand recognition for the author and saves significant money on hiring different illustrators for each installment.
Social media content creators and influencers also benefit immensely. In an economy driven by visuals, having a unique avatar or a set of personalized stickers can define a channel's identity. Using the Female Portrait Base brushes, a creator can generate a library of reaction images or story highlights that look professionally drawn but were assembled in minutes. This democratizes high-quality visual content, allowing individuals without formal art training to produce graphics that rival those of seasoned illustrators.
Navigating the Installation Process
Getting these powerful tools onto your iPad is straightforward, though it requires a few specific steps since Procreate does not natively unzip files. When you purchase the package, you will receive a Zip file containing the three essential brush sets. To begin, you need to extract these files using a free utility app available on the App Store, such as FileExplorer, File Manager, or iZip. Once you have opened the Zip file in one of these apps and extracted the contents, look for the "Share" or "Open In" option.
Select Procreate from the list of applications. If this direct option appears, the brushes will automatically import into your library. However, if "Open in Procreate" is not immediately visible, there is a reliable manual method. First, open a new canvas in Procreate and tap the paintbrush icon to reveal the Brushes panel. At the top of the brush list, you will see a button (often a plus sign or an import label); tapping this allows you to browse your files. Navigate to the folder where you extracted your downloaded sets, tap on the specific brush set file, and it will instantly load into your Procreate interface, ready for use.
Strategic Considerations for Artists
While the convenience of stamp brushes is undeniable, approaching them with the right mindset is crucial for maintaining artistic integrity. The primary consideration is customization. A common pitfall for new users is relying too heavily on the stamps exactly as they appear, which can lead to artwork that looks generic or "stamped." The true power of the Character Portrait Creator brushes emerges when you treat them as a foundation rather than a finished product.
Experienced digital painters use these stamps as a underpainting layer. For instance, after applying a hair stamp, they might lower the opacity, change the blending mode to "Multiply" or "Overlay," and paint over it with custom colors to match their specific lighting scenario. They might use the liquify tool to warp a clothing stamp so it fits the dynamic pose of their character perfectly. The brushes provide the texture and complexity, but the artist provides the context and cohesion.
Another vital factor is resolution and canvas size. Stamp brushes are raster-based, meaning their quality is tied to the pixel dimensions of your canvas. If you plan to print your artwork on large posters, ensure you are working on a sufficiently large canvas within Procreate before applying the Procreate Portrait Creator Brushes. Applying a detailed hair stamp on a small canvas and then scaling the image up later will result in pixelation and loss of detail. Always start big; you can always scale down for web use, but you cannot add detail that wasn't there originally.
Bridging the Gap Between Software and Creativity
It is also worth noting the cross-platform compatibility mentioned in the package details. While the primary focus is on the iPad ecosystem, the inclusion of versions for Photoshop makes this a versatile asset for hybrid workflows. An artist might sketch and block out colors on an iPad during a commute using the portable convenience of Procreate, then finish the high-resolution rendering and post-processing on a desktop using Photoshop. Having the same brush dynamics and stamp libraries available in both environments ensures a seamless transition between devices, preserving the artistic intent throughout the pipeline.
Ultimately, tools like the Female Portrait Hair and Female Clothing and Extras sets are about reclaiming time. They remove the friction of repetitive tasks, allowing the artist to stay in the "flow state" longer. Whether you are a concept artist iterating on a game character, an author visualizing a novel, or a hobbyist looking to create stunning social media avatars, these brushes serve as a force multiplier. They do not replace the need for an eye for color, composition, or anatomy, but they certainly lighten the load, letting your creativity take the lead while the software handles the heavy lifting of texture and detail.