Mastering Digital Lettering: A Practical Guide to Alphabet Brush Stamps in Procreate
Digital lettering can feel intimidating when you are staring at a blank canvas, wondering if your hand-eye coordination will ever match the polished graphics you see on social media. This is where the Alphabet Brush Stamp becomes an invaluable asset for creators using Procreate. Whether you are a small business owner designing Instagram posts, an educator creating engaging worksheets, or a hobbyist starting a digital journal, having a reliable set of pre-made letters can bridge the gap between idea and execution. However, simply downloading a file does not guarantee professional results. Many users stumble over technical setup and workflow inefficiencies that diminish the quality of their final output.
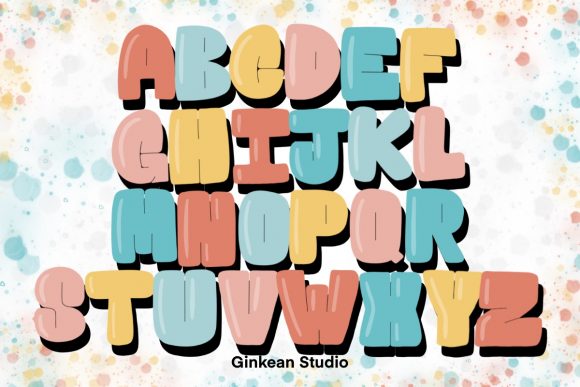
The core appeal of a 26 Alphabets brush stamp collection lies in its consistency. Unlike hand-lettering every single project, which can lead to uneven spacing and varying stroke weights, a stamp set ensures uniformity across your designs. You get a zipped file containing 26 individual brush stamps, ready to be imported into the most updated version of Procreate. Yet, a common misunderstanding arises immediately after purchase: users often treat these tools as static images rather than dynamic brushes. This distinction is crucial. When used correctly, these Procreate brushes allow you to change colors, adjust opacity, and layer effects just like a hand-drawn stroke. Treating them as flat PNGs limits their potential and forces you into a rigid workflow that is difficult to edit later.
Avoiding the Trap of Outdated Software
One of the most frequent issues creators face is compatibility. The digital art landscape evolves rapidly, and Procreate tools are no exception. A significant number of users attempt to import modern brush sets into older versions of the app, leading to frustration when features do not render correctly or the file fails to load entirely. Before you even think about downloading your new ABC brush set, ensure your iPad is running the latest operating system and that your Procreate app is fully updated. Developers design these stamps to leverage current rendering engines; using an outdated version can result in pixelated edges, missing texture details, or complete functionality loss. This simple oversight can make a high-quality product feel defective, leading to unnecessary dissatisfaction.
Furthermore, many beginners overlook the installation process itself. It is tempting to tap the file directly from an email or a browser download folder, but this often leads to confusion about where the file actually went. The correct approach is to save the zipped file to your "Files" app, unzip it there to reveal the .brushset file, and then tap it to automatically open Procreate. Skipping the unzipping step or trying to import individual image files instead of the brush set will leave you with a gallery full of photos rather than a functional tool in your brush library. Taking those extra ten seconds to manage your files properly saves minutes of troubleshooting later.
Workflow Efficiency and Creative Flexibility
Another area where users often miss the mark is in their layer management. Because Procreate stamps are so easy to use, there is a tendency to stamp every letter of a word onto a single layer. While this seems efficient initially, it creates a nightmare for editing. If you need to change the color of just one letter or adjust the kerning between two specific characters, you are forced to erase and restamp the entire word. A more professional approach is to create a new layer for each word or even each letter when precision is required. This non-destructive workflow allows you to experiment with blend modes, drop shadows, and gradients on specific parts of your text without affecting the rest of your design.
Consider the scenario of creating an Instagram post for a flash sale. You want the word "SALE" to pop with a gradient fill, but keep the rest of the text solid. If all letters are on one layer, achieving this effect is cumbersome. By utilizing separate layers, you can clip a gradient map to just the "S" and "E," adding depth and visual interest instantly. This level of control transforms a basic stamp set into a versatile design engine. It empowers marketers and bloggers to produce unique graphics that do not look like generic templates, maintaining brand distinctiveness while saving time.
Choosing the Right Style for Your Audience
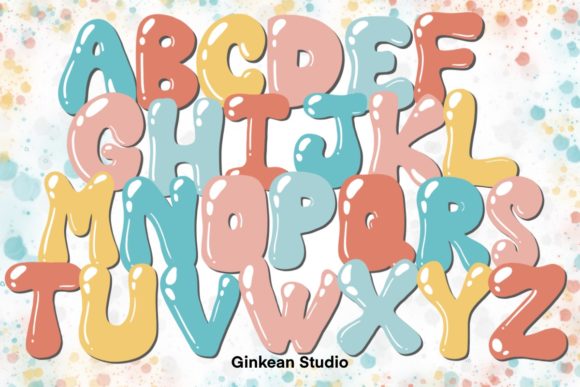
Not all alphabet stamps are created equal, and selecting the wrong style for your specific project can undermine your message. A whimsical, bubbly ABC brush might be perfect for a children's party invitation but could appear unprofessional on a corporate financial report. Before committing to a design direction, evaluate the tone you wish to convey. Are you aiming for elegance, urgency, playfulness, or authority? The texture within the brush stroke matters too. Some stamps mimic dry ink for a vintage feel, while others offer smooth, vector-like lines for a modern aesthetic. Misaligning your font style with your content intent can confuse your audience and dilute the impact of your communication.
Additionally, scalability is a factor often ignored until it is too late. Always test your chosen brush at various sizes before finalizing a project. Some detailed brush stamps lose their definition when scaled down too small, turning into indistinguishable blobs. Conversely, stretching a low-resolution stamp too large can reveal pixelation. Since these tools are designed for the most updated version of Procreate, they generally handle scaling well, but it is wise to verify legibility on different device screens. What looks crisp on an iPad Pro might appear muddy on a smartphone feed if the stroke weight is too thin.
Maximizing Value Beyond Basic Text
To truly get your money's worth from a 26 Alphabets brush stamp pack, look beyond standard typing applications. These tools are excellent for creating custom logos, watermarks, and decorative elements that add personality to your work. For digital planners, using these stamps to create consistent headers and tab labels can elevate the user experience significantly. Instead of relying on system fonts that everyone else uses, you can build a proprietary typographic style that becomes synonymous with your brand. Freelancers can bundle these custom graphics as part of their service offerings, providing clients with unique assets that stand out in a crowded marketplace.
It is also important to remember that creativity thrives on experimentation. Do not be afraid to combine your alphabet stamps with other Procreate brushes and textures. Add a grain overlay to soften the edges, or use the liquify tool to give your stamped letters a hand-drawn, organic flow. The goal is not to let the tool do all the work, but to use it as a foundation upon which you build your artistic vision. By avoiding the pitfalls of poor file management, outdated software, and rigid workflows, you unlock the full potential of these digital assets.
Ultimately, the value of an Alphabet Brush Stamp collection is determined by how effectively you integrate it into your creative process. It is not just about having 26 letters; it is about having the freedom to communicate clearly and beautifully without being bogged down by technical hurdles. Whether you are drafting a quick social media update or designing a comprehensive brand kit, approaching these tools with a strategy focused on flexibility and quality will yield far superior results. Take the time to set up your workspace correctly, respect the nuances of layer management, and choose styles that align with your goals. With these practices in place, your digital lettering will not only look professional but will also bring a sense of joy and efficiency to your daily creation routine.